软件:haproxy—主要是做负载均衡的7层,也可以做4层负载均衡
apache也可以做7层负载均衡,但是很麻烦。实际工作中没有人用;
负载均衡是通过OSI协议对应的;
7层负载均衡:用的7层http协议;
4层负载均衡:用的是tcp协议加端口号做的负载均衡;
ha-proxy概述
ha-proxy是一款高性能的负载均衡软件。因为其专注于负载均衡这一些事情,因此与nginx比起来在负载均衡这件事情上做的更好,更专业。
ha-proxy的特点
 1ha-proxy 作为目前流行的负载均衡软件,必须有其出色的一面。下面介绍一下ha-proxy负载均衡软件的优点。
 2
 3•支持tcp / http 两种协议层的负载均衡,使得其负载均衡功能非常丰富。
 4
 5•支持多种负载均衡算法,尤其是在http模式时,有许多非常实在的负载均衡算法,适用各种需求。
 6
 7•性能非常优秀,基于单进程处理模式(和Nginx类似)让其性能卓越。
 8
 9•拥有一个功能出色的监控页面,实时了解系统的当前状况。
10
11•功能强大的ACL支持,给用户极大的方便。
12
13haproxy算法:
14
151.roundrobin
16
17基于权重进行轮询,在服务器的处理时间保持均匀分布时,这是最平衡,最公平的算法.此算法是动态的,这表示其权重可以在运行时进行调整.
18
192.static-rr
20
21基于权重进行轮询,与roundrobin类似,但是为静态方法,在运行时调整其服务器权重不会生效.不过,其在后端服务器连接数上没有限制
22
233.leastconn
24
25新的连接请求被派发至具有最少连接数目的后端服务器.
实践准备
没有太多资源,用容器模拟实现
web 容器创建
master 主节点服务器一台,正式使用建议多准备一台备用,node 代理服务器10台(用来进行web测试),可以根据虚拟机配置自行调节;

配置如下:

# 创建文件
docker-compose.yml

haproxy.cfg
 1# docker-compose.yml
 2version: "3.6"
 3
 4services:
 5
 6  ha_proxy:
 7    container_name: ha_proxy
 8    image: haproxy:latest
 9    restart: always
10    expose:
11      - 80
12    volumes:
13      - ./haproxy.cfg:/usr/local/etc/haproxy/haproxy.cfg:ro
14    networks:
15      - traefik
16    labels:
17      - "traefik.enable=true"
18      - "traefik.docker.network=traefik"
19      - "traefik.http.routers.haproxy.entrypoints=http"
20      - "traefik.http.routers.haproxy.rule=Host(`haproxy.halobug.cn`)"
21      - "traefik.http.services.haproxy-backend.loadbalancer.server.scheme=http"
22      - "traefik.http.services.haproxy-backend.loadbalancer.server.port=80"
23    logging:
24      driver: "json-file"
25      options:
26        max-size: "10m"
27
28networks:
29  traefik:
30    external: true
 1# haproxy.cfg
 2
 3global
 4        log 127.0.0.1 local0
 5        log 127.0.0.1 local1 notice
 6defaults
 7        log global
 8        mode http
 9        option httplog
10        option dontlognull
11        timeout connect 5000ms
12        timeout client 50000ms
13        timeout server 50000ms
14        stats uri /status
15frontend balancer
16        bind 0.0.0.0:80
17        default_backend web_backends
18backend web_backends
19        balance roundrobin
20        # 启动了 10个容器 进行web测试,
21        server server1 local_2_web_nginx_1:80 check
22        server server2 local_2_web_nginx_2:80 check
23        server server3 local_2_web_nginx_3:80 check
24        server server4 local_2_web_nginx_4:80 check
25        server server5 local_2_web_nginx_5:80 check
26        server server6 local_2_web_nginx_6:80 check
27        server server7 local_2_web_nginx_7:80 check
28        server server8 local_2_web_nginx_8:80 check
29        server server9 local_2_web_nginx_9:80 check
30        server server10 local_2_web_nginx_10:80 check
#启动

docker-compose down && docker-compose up -d

# 绑定hosts

127.0.0.1 haproxy.halobug.cn
haproxy容器

web容器

浏览器访问 http://haproxy.halobug.cn,如下图。

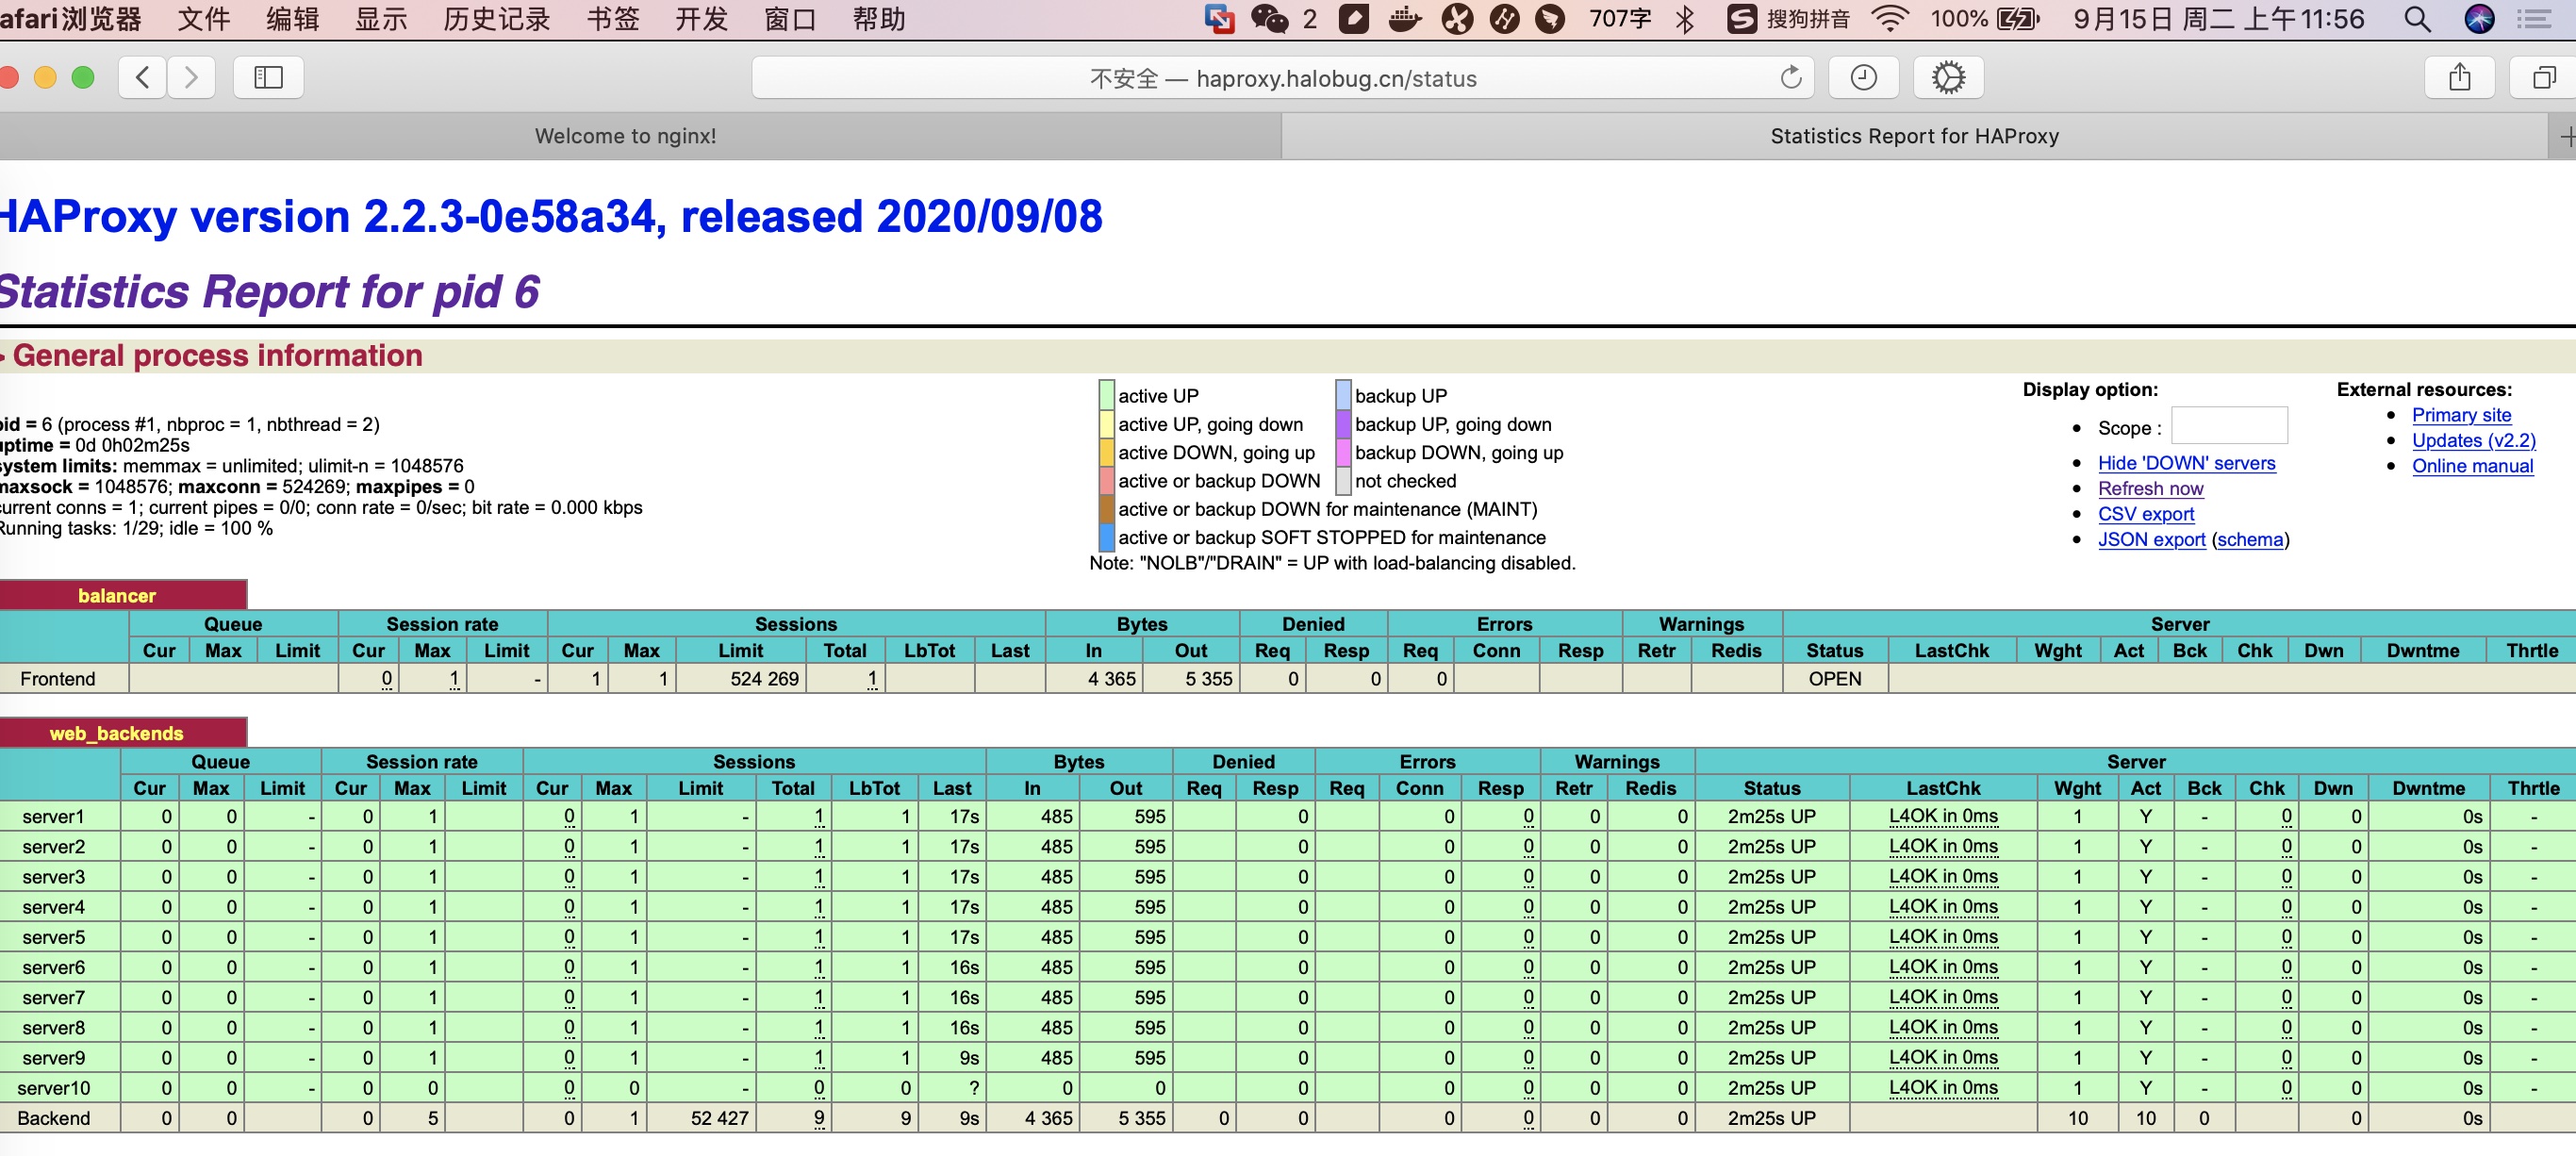
根据haproxy.cfg 配置 查看 haproxy 监控,http://haproxy.halobug.cn/status ,如下图。
使用ab测试 查看分发效果
# 执行后查看 status 监控
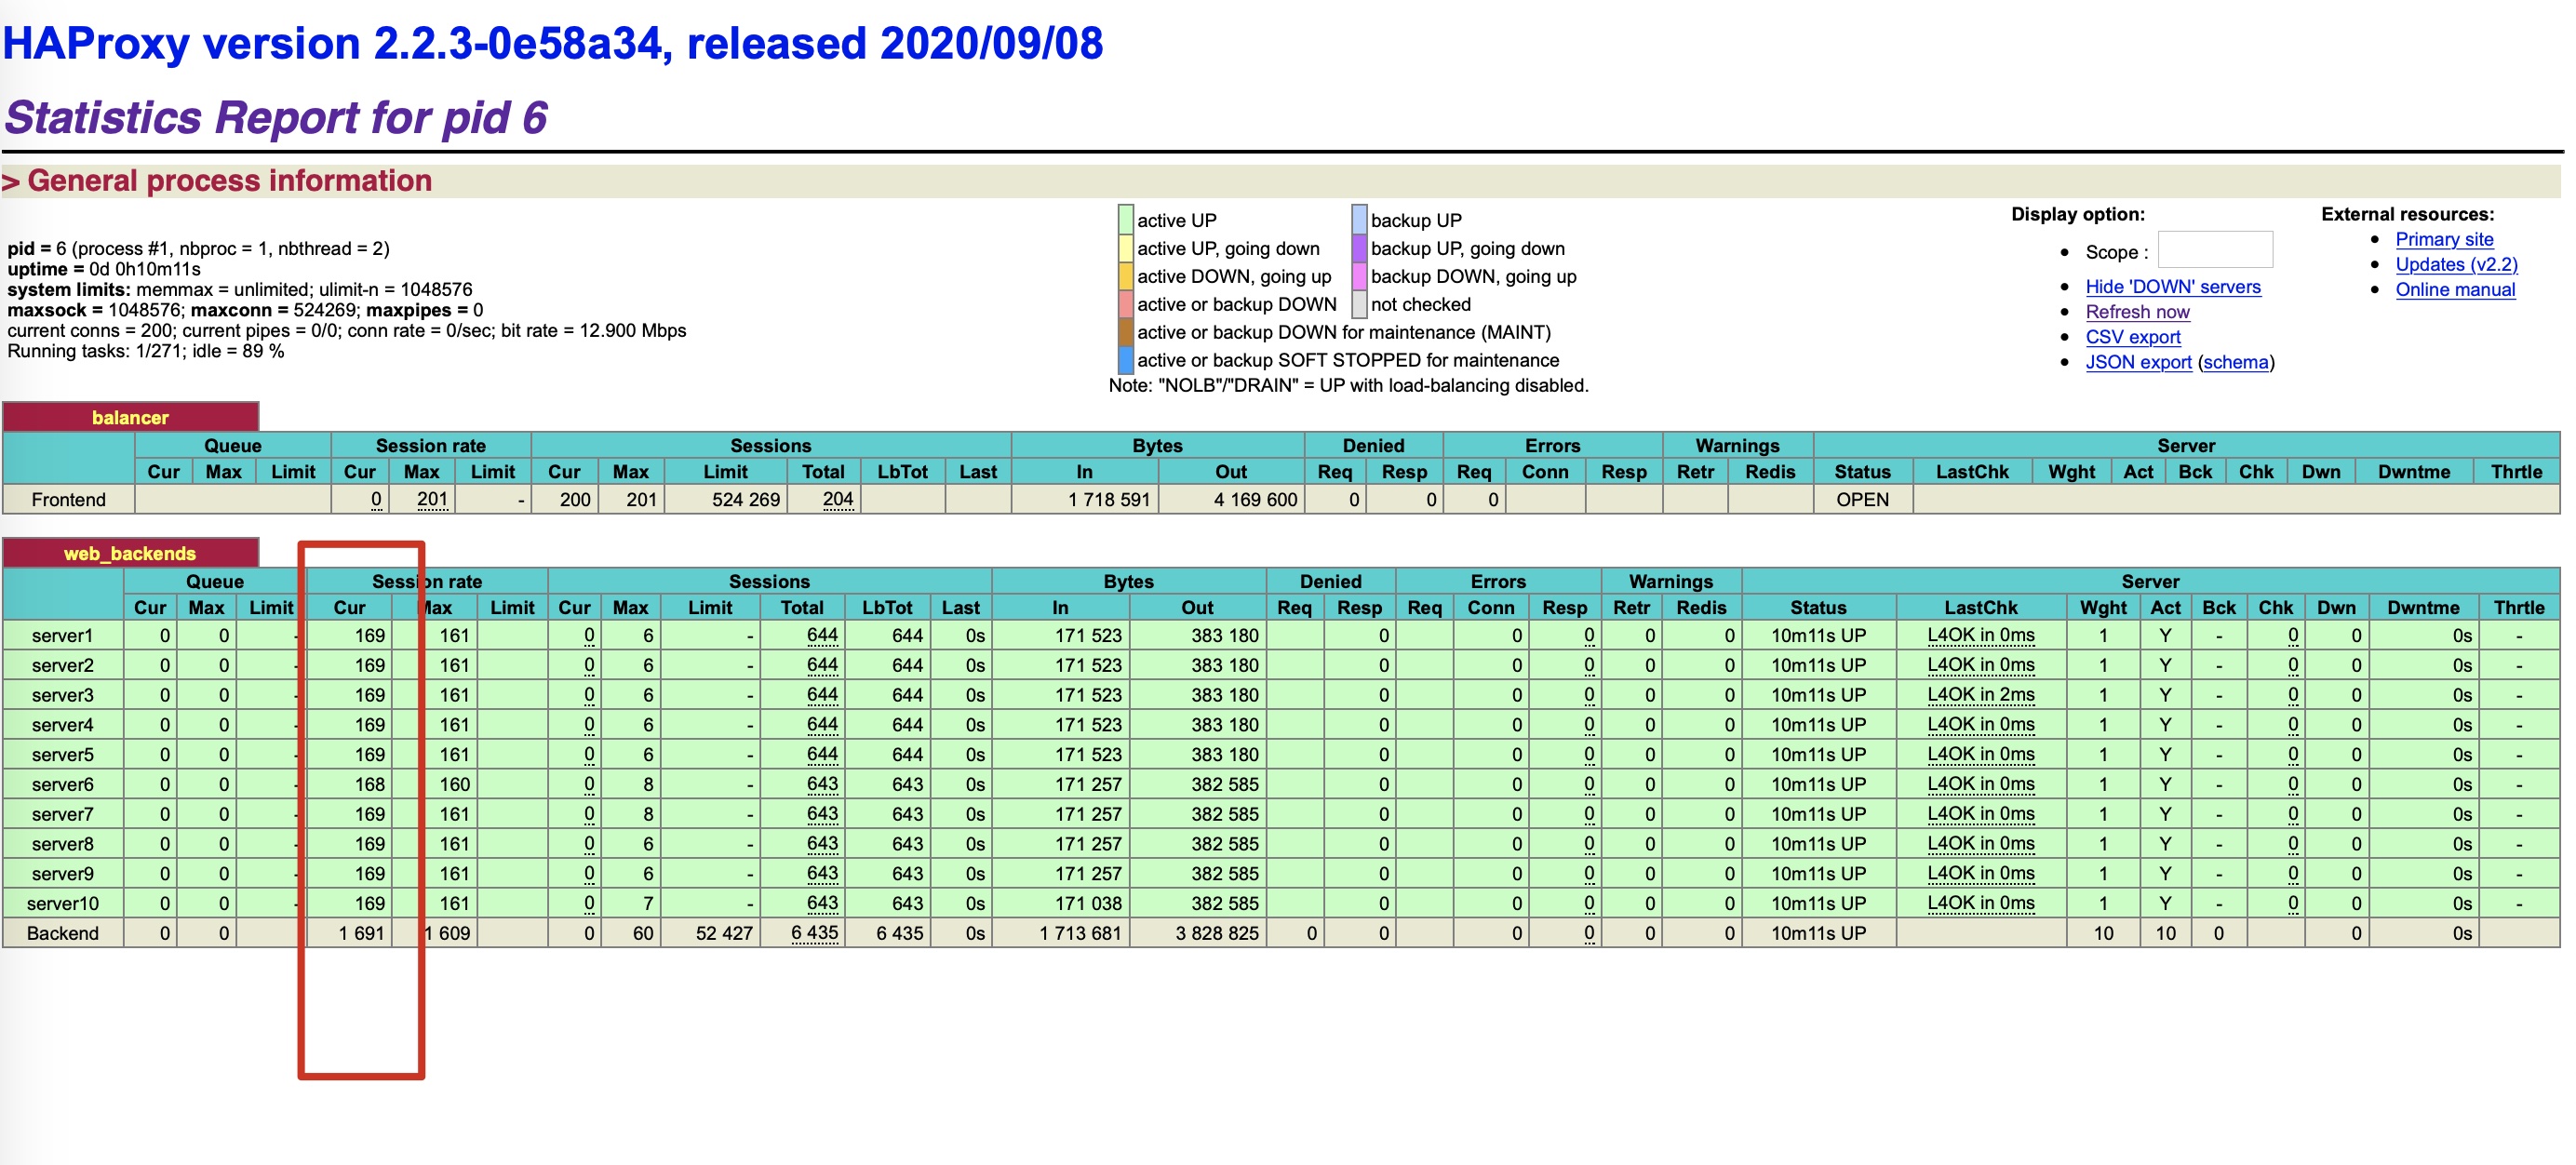
ab -n 20000 -c 200 http://haproxy.halobug.cn/
监控很清晰的能看见每台机器当前分发的请求量。
试着停掉某一台机器
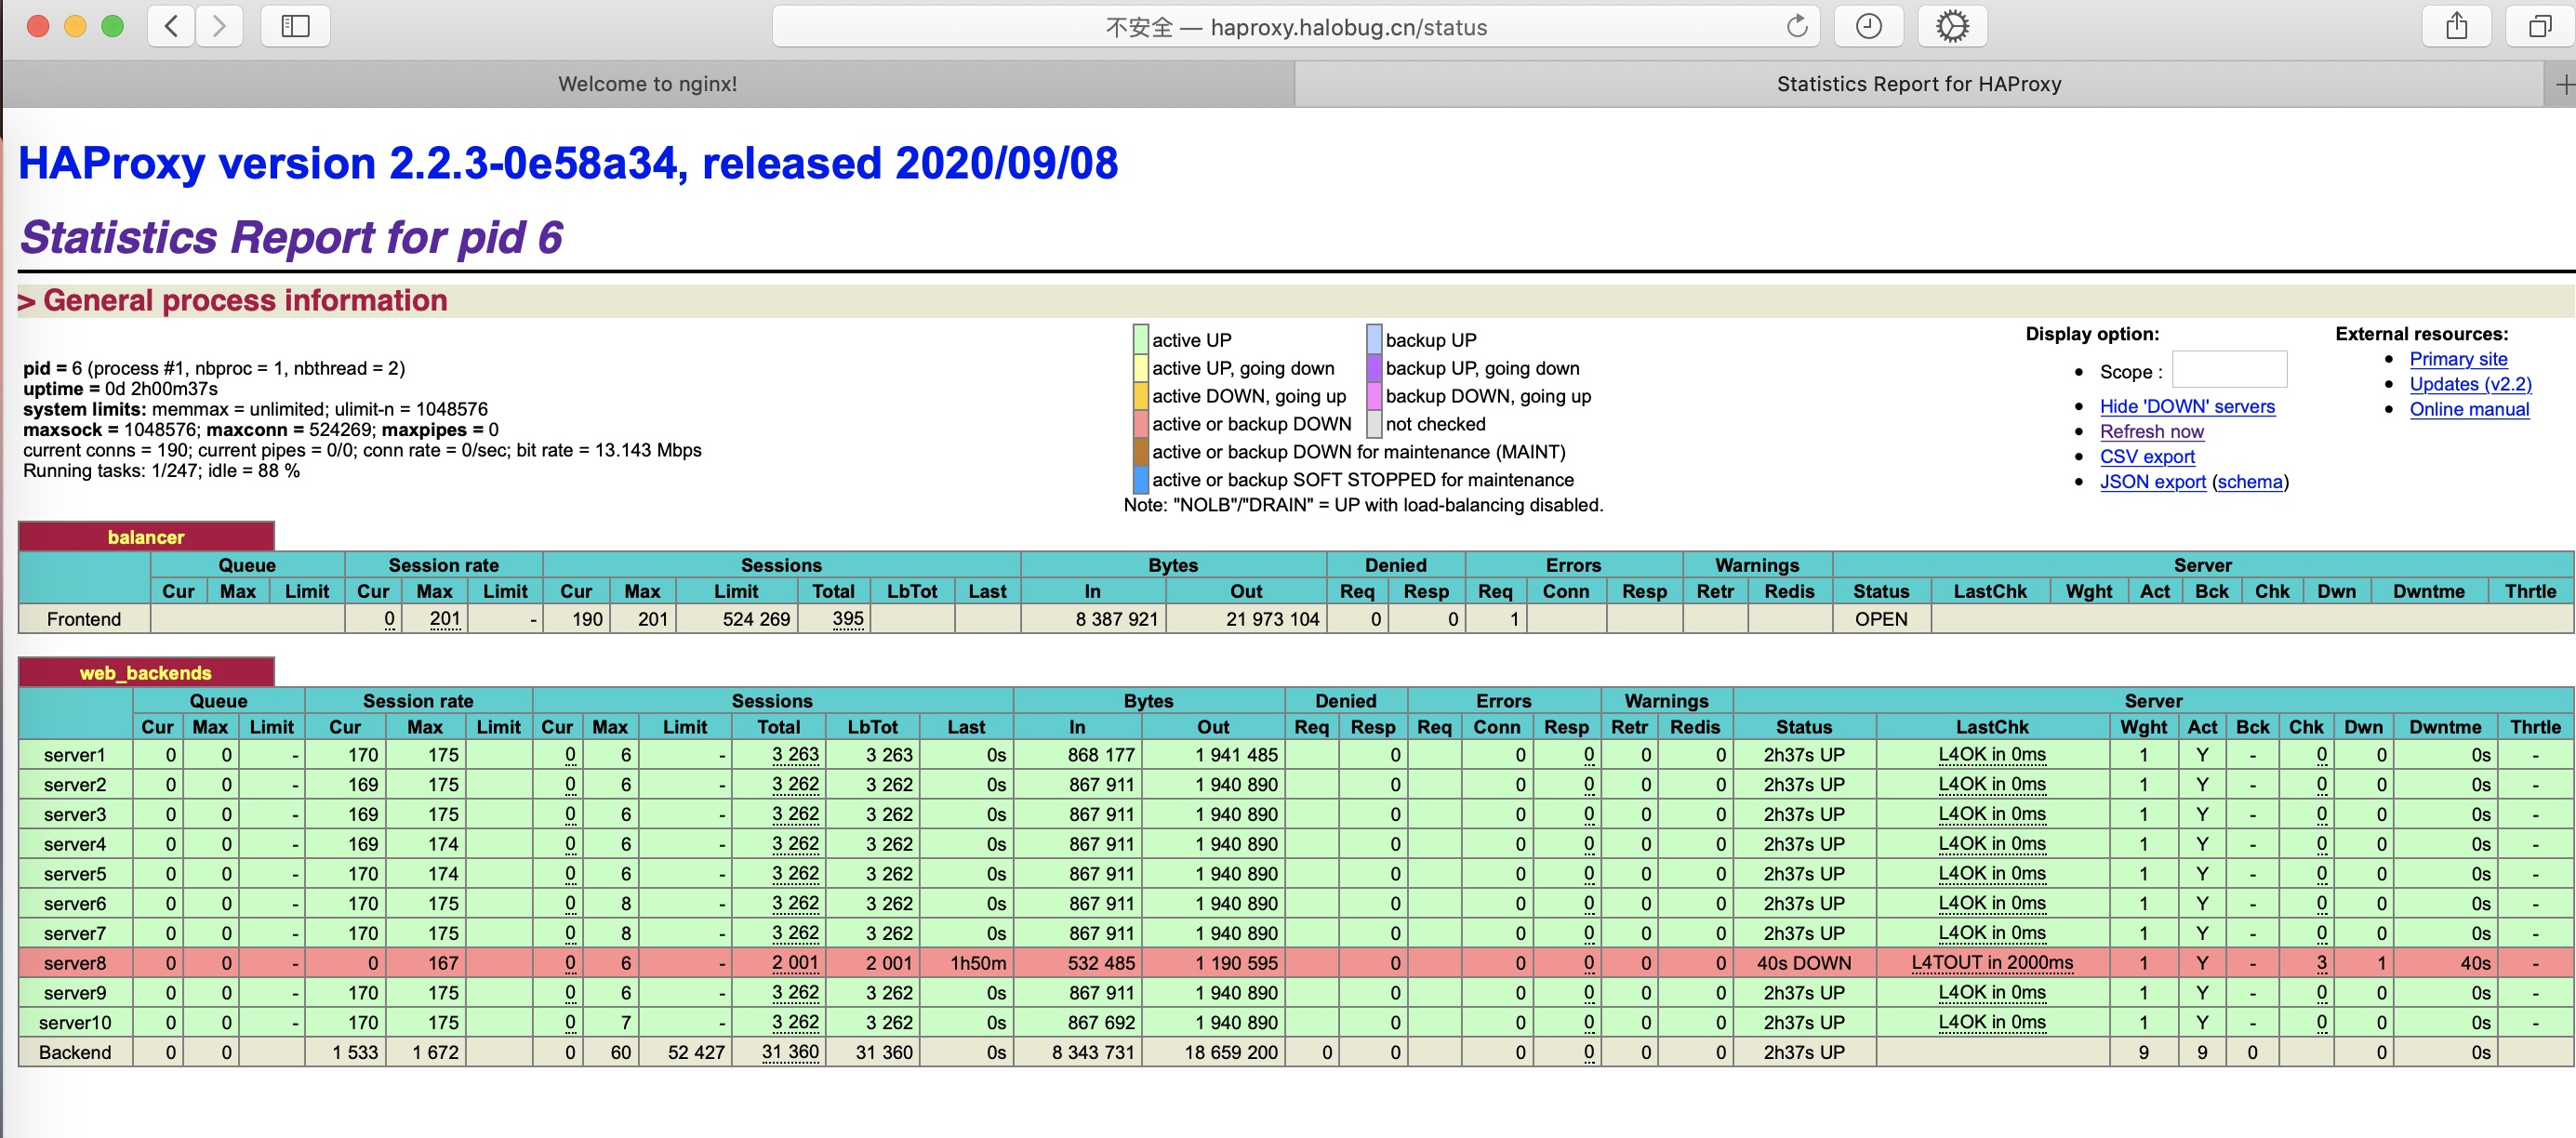
docker stop local_2_web_nginx_8
可以看到server 8的机器状态down掉了,继续使用ab测试,如下图 server8 是down掉的,此时请求不会分发到这台机器,重新启动后恢复正常。
如高可用,可搭配 Keepalived VRRP 结合使用。
到这里就算完成了,快动手吧。